|
Forcing a Com port to a new number (PDF) |
|
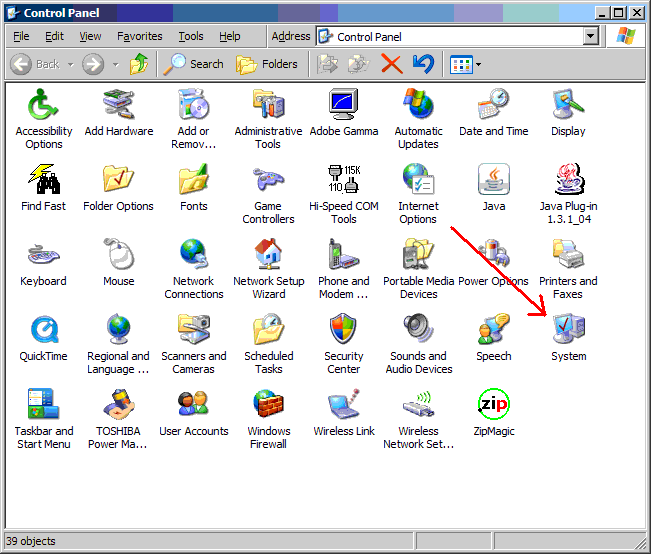 |
1. After plugging in a new USB serial port, start the control panel and select the system icon (Or item if in "List" view") |
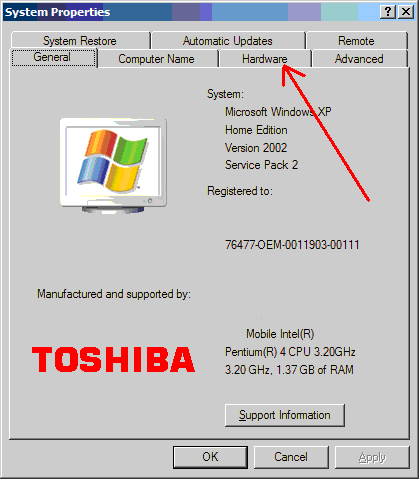 |
2. Select the "Hardware" tab. |
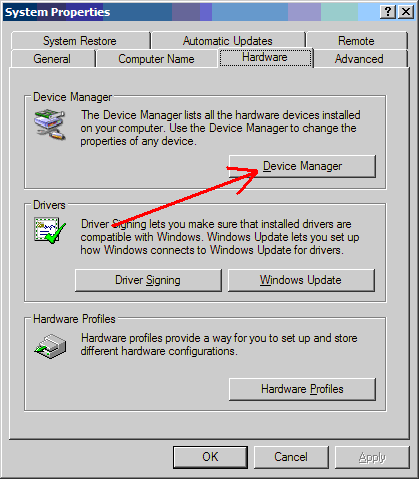 |
3. Hit the "Device Manager" button to bring up the installed devices list. |
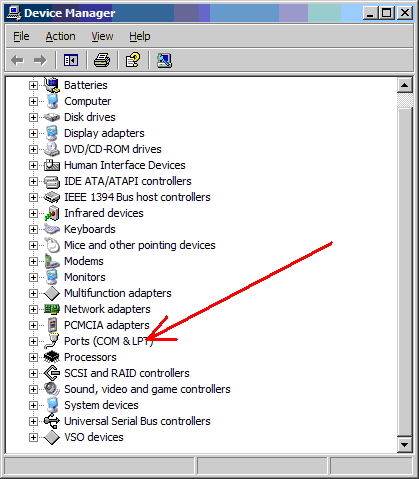 |
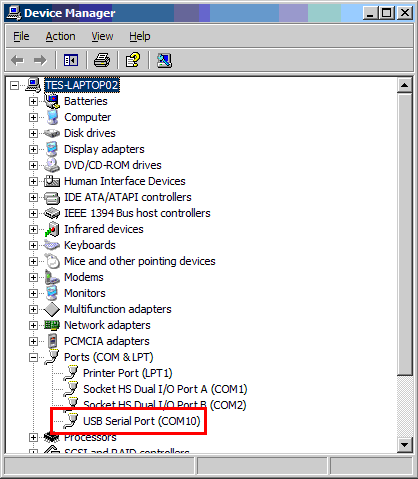
4. Select the "Ports" item to display the available ports. |
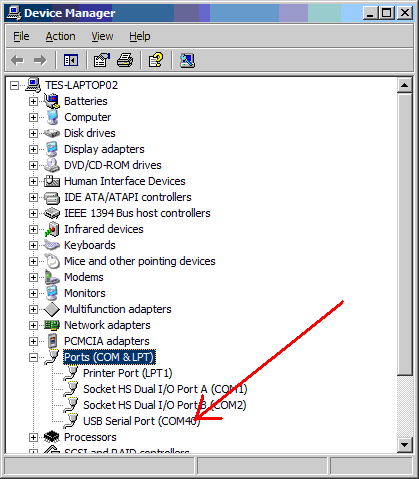 |
5. The device you just plugged in will probably have the highest listed Com port number, you can check this by unplugging the cable and see which port comes off the list. Be sure to plug it back in before proceeding! |
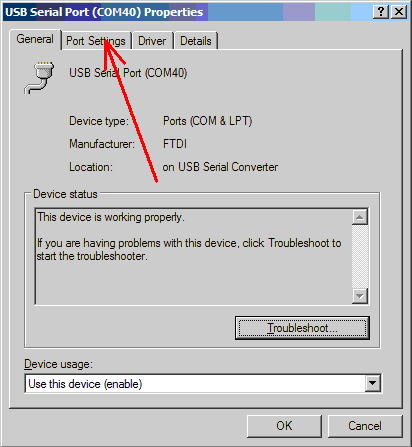 |
6. Select the "Port Settings" tab. |
 |
7. Hit the "Advanced" button to get to the port control window. |
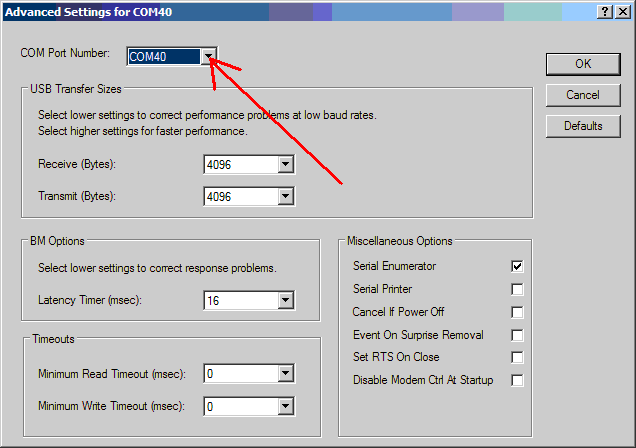 |
8. Select the "Com Port Number" list to display the available numbers and select the one you want. USB port assignments that are not currently active are useable when they are not plugged in at the same time as the one you are changing. Hardware ports on your computer should never be selected! |
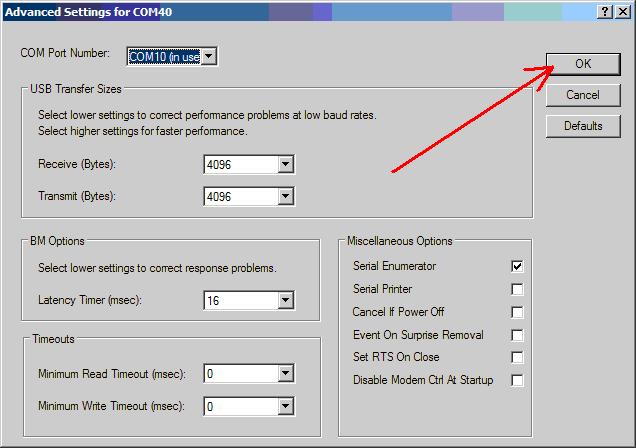 |
9. Hit "OK". |
|
|
10. Hit "Yes" to allow the assignment of this port to a "Used" port if you have selected one that is assigned but not currently active. |
 |
11. If you unplug the cable and then plug it back in, the list should reflect the changes you just made. This device plugged into this particular USB port will be assigned the selected number from now on. Plug it into a different port on your computer and it will again get the next available port at the bottom of the list. Windows keeps track of the serial numbers and USB ports. |